

As promised here is the piece on doing a few simple edits with irfanview. I chose a simple picture for the sake of the piece that had all straight lines. Irfanview uses commands that are familiar, after starting the program use the file open commands to open your picture out of my pictures files. First we will crop it.
1. If you move your cursor onto the picture you will see that it turns into crosshairs. Holding your left mouse button nails that crosshair down and dragging the mouse will create a selection in the picture. I imagine how I might want to crop this picture and choose a left top corner starting point, dragging my mouse to create the square. In the picture above I have started the process. In the picture below I have finished drawing the square.
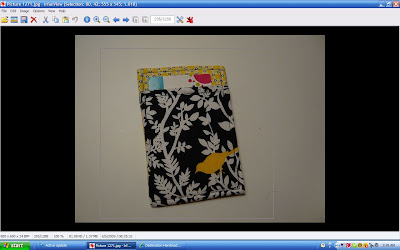
2. In this picture you will notice that I have drawn my square, the lines barely show. In the top blue bar it also shows my pixels. I got them to be almost equal (555 by 544) since I wanted approximately a square. I then hit the control and Y keys, this cuts away the unwanted area outside the square. Below is my cropped picture.
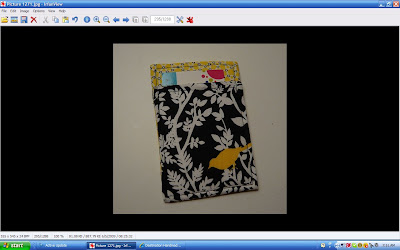
Now we will give it a white background to float on.
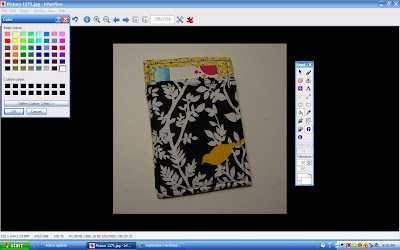
1. Go to the edit drop down and choose show paint dialog. It will bring on the box shown in the right of the pic below. The commands are very similar to the pc paint program we all let our kids use.
2. Next we are going to choose our background color. In the paint dialog box on the right click on the one of the two small rectangles in the bottom. This will bring up the color selection box you see on the left of the picture. For each rectangle you will have to choose a color and hit okay. I chose white for both.
3. Now we will outline the picture. This keeps the fill color we will put in the background from "creeping" into the picture. It is important that there are no holes in our outline of the picture. In the paint dialog click on the box that has the diagonal line in it on the left above the circle. This will give you a crosshair like the cropping procedure. You can choose how wide the line is byusing the up and down arrows making the width px higher for a wider line, or lower for a more narrow line. I used a 14 px line. I find a wider one easier to use and see. Nail down the line start point with your left mouse button at one corner and drag it to the point you want your line to end. Release the mouse and you will have a line like this.
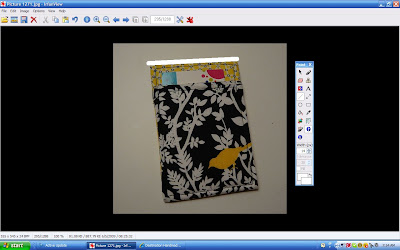
4. Do this for all 4 sides of the item.
 5. Now click on the paint can that is tipping over. Touch it to the area outside of the square you drew and click your mouse. Now your background is the color you want! There may be a few areas of clutter that need to be cleaned up so just click on the eraser symbol and hold down the left mouse button while moving your mouse, this will erase anything with the new background color. Extra hint, if there is anything that accidentally got "erased" with your new color, you can restore it by using the erase tool and the right mouse button. When you drag your mouse then the original pixels of the picture are restored!
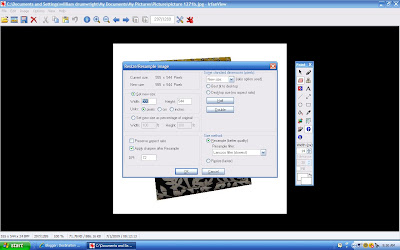
The last thing we will do is change the resolution for uploading. Close the paint dialog and hit control and r at the same time. This brings up the resolution box. On the right there is a drop down that includes defaults, or on the right you may put in your own choices. If the resolution you choose makes it appear all wonky (technical term) just hit edit undo and try again. You may also change the resolution of the original picture before you start editing the picture if that is easier for you. Edit undo will always take you one step back if you mess up.
 I hope that this helps anyone who is getting started trying to make better pictures. There are lots of resources and programs out there for you to use and a lot of them are free. It just takes time to practice using them. These are just first steps, there are lots of things that you can do with this software. Best of luck, and please comment with any tips or resources you may have! Jamie.
No comments:
Post a Comment